This page allows you to adjust and customize your academy according to your preference.
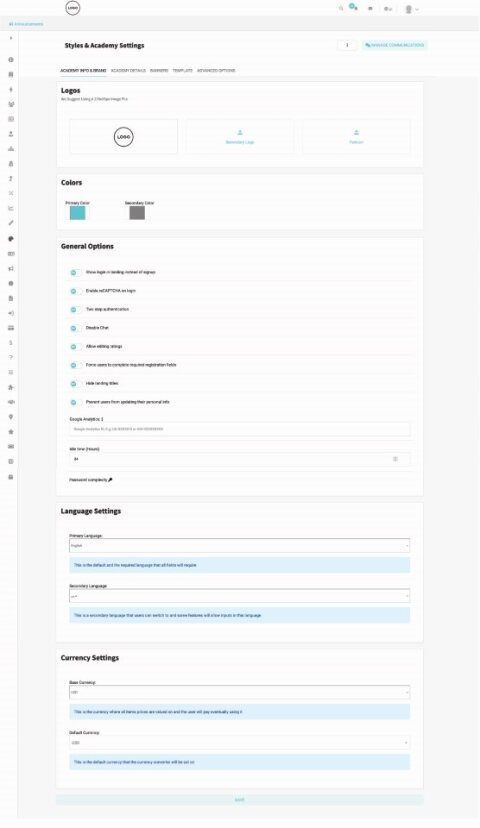
To manage styles and academy settings: #
- Click the Styles & Academy Settings tab from the sidebar.
- Upload your main logo, secondary logo, and favorite icon.
- Adjust your primary and secondary colors by clicking them and choosing the required color. These are the colors of your academy interface.
- Use the toggles to adjust the general options according to your preference.
- Click the Password Complexity button to manage settings like the password length and components. Don’t forget to save!!
- Choose the primary and secondary languages.
- Choose the base and the default currencies.
- Click Save to save your settings.
To manage academy details: #
- Click the Styles & Academy Settings tab from the sidebar.
- Click the Academy Details tab.
- Upload an introductory video from your device by choosing Video from the drop-down list. Alternatively, you can upload a video from YouTube or Vimeo by copying and pasting the link.
- Click Save.
- Add a No Reply Email with which the users can contact the academy.
- Add the academy details like its name, country, email, etc.
- Click Save to save your settings.

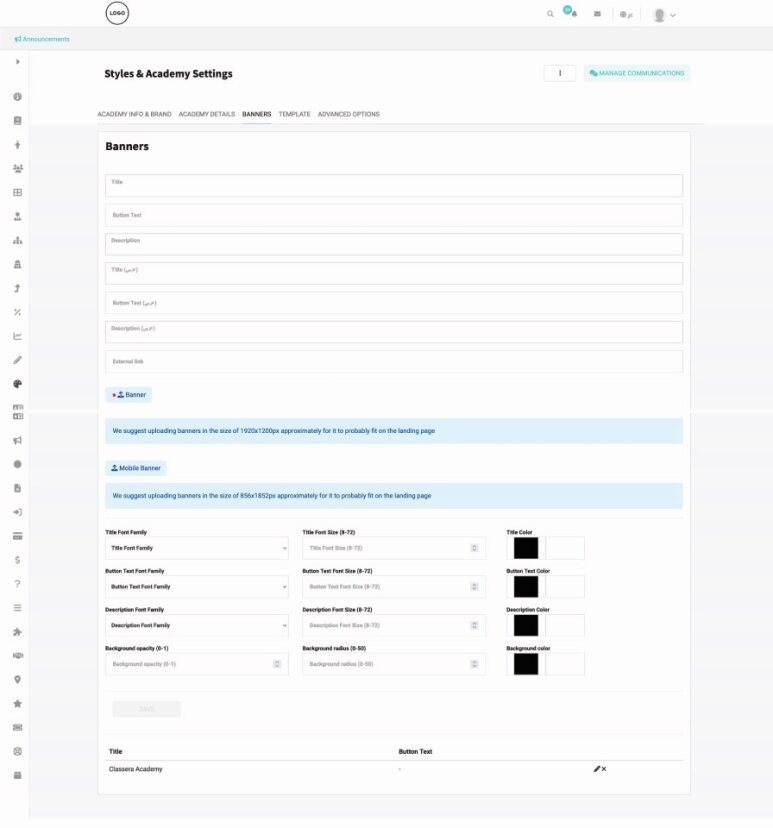
To manage banners: #
- Click the Styles & Academy Settings tab from the sidebar.
- Click the Banners tab.
- Type the title of the banner both in English and Arabic.
- Type the button text both in English and Arabic.
- Type a description for the banner both in English and Arabic.
- Upload your banner. (We suggest uploading banners in the size of 1920x1200px approximately for it to properly fit on the landing page.)
- Upload your banner in the mobile size. (We suggest uploading banners in the size of approximately 856x1852px for it to Properly fit on the landing page.)
- Choose the font and size of the title, button text and description from the drop-down lists.
- Select the color of the title, button text and description by clicking the required color.
- Type the background opacity and radius in the number fields.
- Click Save to save your settings.
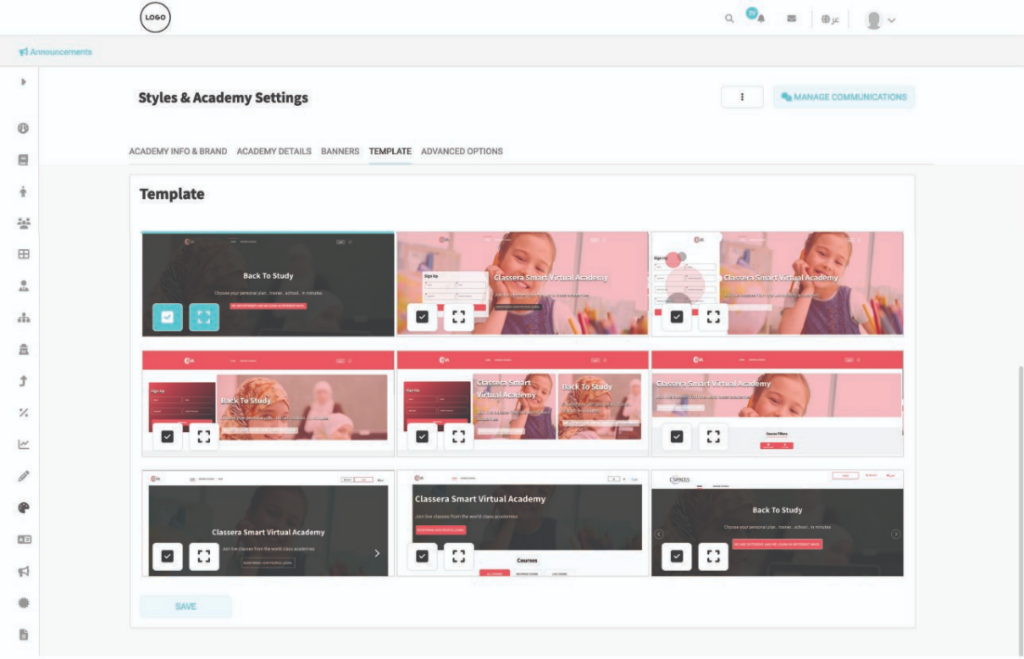
To manage templates: #
- Click the Styles & Academy Settings tab from the sidebar.
- Click the Templates tab.
- A number of templates appear, browse them by clicking the maximize button to view the template in full screen mood.
- Click the
 button to choose the required one.
 - Click Save.
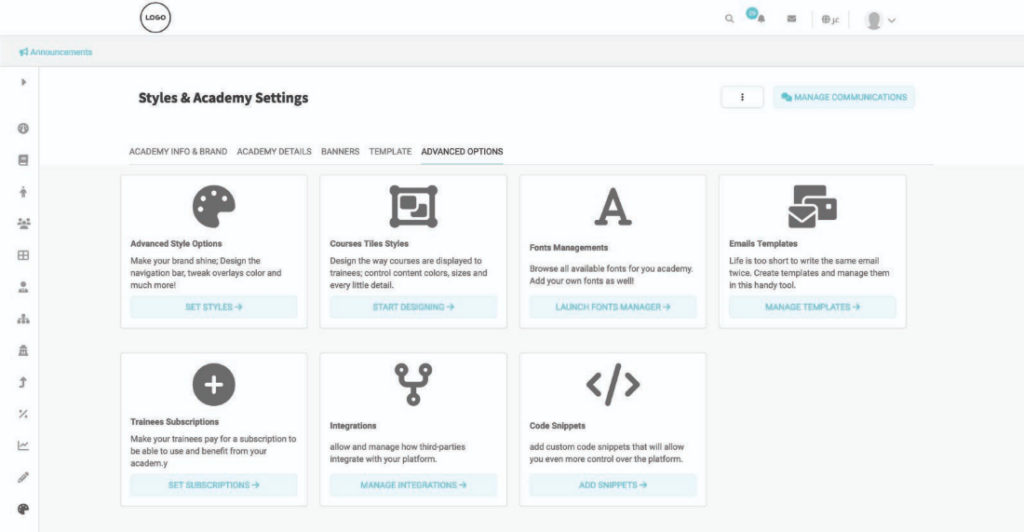
To manage advanced options: #
- Click the Styles & Academy Settings tab from the sidebar.
- Click the Advanced Options tab.
- Several advanced options appear to help you:
- Advanced style option: It’s used to adjust the style (font – size – color) of the overall of the site, the navigation bar, the sub menu, the logo, the login and signup, the banners, the footer, the breadcrumbs and the profile.
- Courses Tile Styles: It’s used to adjust the style (size – color) of the courses’ tile, icon, title, category, packages, description, date, registration date, credit hours, price, type and trainer.
- Fonts Management: It’s used to browse all available fonts for your academy and to add your own fonts as well.
- Email Templates: It’s used to view and edit all email templates available for your academy.
- Trainees Subscription: It’s used to create subscriptions for the trainees to buy and benefit from the academy by setting a price and period.
- Integrations: It’s used to allow and manage how third parties integrate with your platform. For example, Microsoft, you can add a button on the academy login page that will allow users to sign in/sign up using this platform.
- Code Snippets: It’s used to create codes to allow you more control over the platform